 how-to
How to Install Audi A3 8V OEM Virtual Cockpit
Table of Contents
- What You'll Need Before Starting
- Audi A3 Virtual Cockpit Compatibility by Model Year and Trim
- Audi A3 8V Instrument Cluster Removal: Step-by-Step
- OEM Audi A3 Virtual Cockpit Parts and Part Numbers
- Installing the New Virtual Cockpit Unit
- Audi Virtual Cockpit Coding and Adaptation
- Common Mistakes to Avoid
- Post-Installation Testing and Troubleshooting
- Frequently Asked Questions
Last Updated: October 7, 2026
What You'll Need Before Starting
Learning how to install Audi A3 8V OEM virtual cockpit requires specific tools and components. Gather everything before you start. Rushing through preparation causes mistakes that cost time and money.
Tools required:
- Torx screwdriver set (T10, T15, T20)
- Plastic trim removal tools
- Socket wrench set (10mm, 13mm)
- Panel removal pry tool
- Wire strippers and crimpers
- Multimeter for testing connections
- OBD diagnostic scanner for coding
Safety equipment:
- Battery disconnect tool or insulated gloves
- Work light or headlamp
- Clean workspace with anti-static mat
- Torque wrench for reassembly
Disconnect your battery first and let it sit for 15 minutes. This protects your vehicle's electrical system and safety features.
At European OEM Parts Direct, we help DIY enthusiasts source genuine OEM components for exactly these projects. Our VIN search tool identifies the correct parts for your specific A3 model year and trim level. Having the right parts before you start prevents costly mistakes.
Audi A3 Virtual Cockpit Compatibility by Model Year and Trim
The Audi A3 8V virtual cockpit retrofit works on specific model years and trim levels. Not all A3 8V models support this upgrade.
Compatible model years:
- 2013-2015 (pre-facelift A3 8V with certain limitations)
- 2016-2020 (facelift A3 8V, S3, and RS3 models)
- 2021+ (newer generation A3, though this guide focuses on 8V)
Pre-facelift A3 8V models (2013-2015) require additional adapter components. The dashboard connector layout changed during the 2016 facelift refresh.
S3 and RS3 variants use the same installation procedure as standard A3 models. The main difference is the sport layout display option available in higher trims. Some early A3 models use analog gauges only. These cannot be upgraded to digital displays without replacing the entire cluster assembly.
The Audi A3 Virtual Cockpit compatibility depends heavily on your vehicle's original equipment. A3 models equipped with the basic instrument cluster cannot accept the virtual cockpit retrofit.
Audi A3 8V Instrument Cluster Removal: Step-by-Step
Removing the original instrument cluster is the most critical step. Mistakes here damage expensive components or break fragile connectors. Take your time and photograph each stage.
Disconnect the Battery
Some A3 models have a disconnect switch under the driver's seat. Check your owner's manual. If your vehicle has one, use it instead of removing the battery terminal.
Remove the Steering Wheel and Lower Dashboard Trim
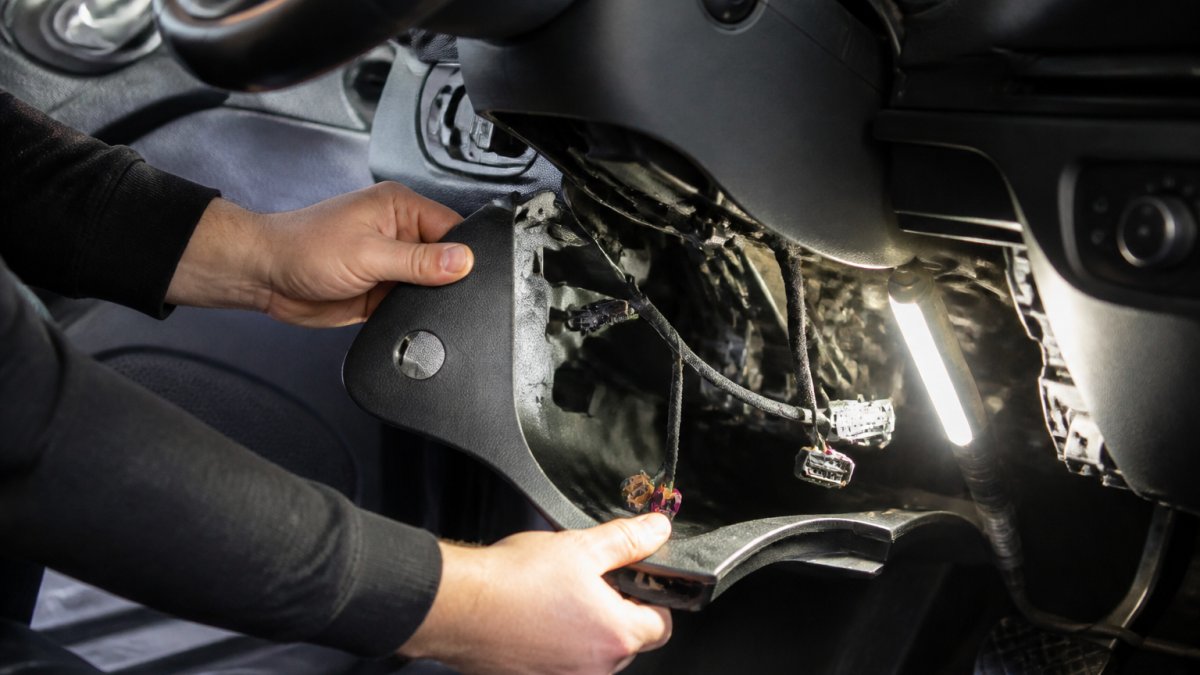
Remove the lower dashboard trim panel below the steering wheel. Three plastic clips hold it in place. Use a plastic trim tool to gently pry from the bottom edge. Work slowly to avoid breaking the clips.
Extract the Instrument Cluster
The cluster should now lift free. Place it on a clean surface. Do not touch the LCD screen or internal components.
OEM Audi A3 Virtual Cockpit Parts and Part Numbers
Genuine OEM parts ensure compatibility and longevity. Aftermarket alternatives often cause coding errors or display problems. Use only OEM components from verified suppliers.
Required parts for Audi A3 8V virtual cockpit installation:
- Digital instrument cluster (8V0920700 or 8V0920701 depending on trim)
- Wiring harness adapter (8V0971095 for pre-facelift models)
- Connector bracket assembly (8V0858069)
- Speedometer sensor calibration module (8V0919209)
- Display control unit (8V0920720 for facelift models)
Part numbers vary by model year and existing equipment. A3 sedans use different part numbers than Sportback models.
Verify every part number against your vehicle identification number (VIN). One incorrect part creates incompatibility issues that require complete removal and reinstallation. European OEM Parts Direct's VIN search tool matches your exact vehicle configuration to the correct part numbers. This eliminates guesswork and prevents costly ordering mistakes.
Pre-facelift A3 8V models (2013-2015) need adapter harnesses. These are not required for 2016+ models.
Installing the New Virtual Cockpit Unit
The process of how to install Audi A3 8V OEM virtual cockpit begins once you've confirmed part compatibility and gathered all components. Work methodically. Rushing causes electrical damage that's expensive to repair.
Connect Wiring Harnesses
Check all three connectors. They should sit flush with no gaps. Loose connections cause display errors or complete failure.
Secure the Unit in the Dashboard
Reinstall the steering wheel. Connect the horn pad connector first. Then slide the wheel onto the column. Tighten the two Torx screws on the back to 45 Nm.
Audi Virtual Cockpit Coding and Adaptation
If the display remains blank or shows error codes, disconnect the battery again. Wait 5 minutes. Reconnect and try the coding process once more. Intermittent power loss sometimes clears temporary errors.
Common Mistakes to Avoid
Mistake 1: Skipping the battery disconnect. Connecting or disconnecting electrical components with the battery active can damage the cluster or trigger airbag errors. Always disconnect the negative battery terminal first and wait 15 minutes.
Mistake 2: Forcing connectors. Connectors are keyed to fit only one way. If a connector resists insertion, stop. Check alignment. Forcing damages the pins inside, creating permanent failure.
Mistake 3: Using incorrect part numbers. Pre-facelift and facelift A3 8V models use different clusters. Ordering the wrong part wastes money and creates incompatibility issues. Verify your vehicle's build date and existing equipment before purchasing.
Mistake 4: Skipping the coding step. The new cluster won't display properly without proper coding. Many DIYers think the physical installation is enough. Coding is mandatory.
Mistake 5: Over-tightening bolts. The cluster housing is plastic. Excessive torque cracks it. Use a torque wrench and follow the specifications exactly.
Mistake 6: Disconnecting connectors in the wrong order. Always disconnect power first, then sensor inputs. Reversing this order can damage sensitive electronics.
Mistake 7: Not photographing the original setup. Take photos at each stage before disconnecting anything. These photos prevent confusion during reassembly.
Post-Installation Testing and Troubleshooting
Turn on the vehicle without starting the engine. The virtual cockpit should display. All gauge needles should move briefly during startup. The display should show current speed, RPM, fuel level, and temperature.
Start the engine. The virtual cockpit should display all real-time data. Speedometer reading should match your actual speed. Tachometer should show current engine RPM. Fuel gauge should display accurately.
Check the navigation display. If your A3 has an infotainment system, the virtual cockpit should display navigation directions. Test this by entering a destination address.
Test the sport layout display. If your vehicle supports the sport layout (S3/RS3), press the mode button on the steering wheel. The display should switch between standard and sport modes.
Common post-installation issues and fixes:
| Problem | Likely Cause | Solution |
|---|---|---|
| Blank display | Loose connector | Reseat all three connectors on cluster back |
| Error codes displayed | Incorrect coding | Reconnect scanner and re-enter coding values |
| Partial display (some gauges missing) | Incomplete wiring connection | Check secondary connector is fully engaged |
| Speedometer reads zero | Sensor module not connected | Verify diagnostic module connector is secure |
| Display flickers | Loose power connector | Disconnect and reconnect primary connector |
If error codes persist after recoding, the cluster module may be defective. Contact the parts supplier for a replacement.
Frequently Asked Questions
Which Audi A3 8V model years are compatible with a Virtual Cockpit retrofit?
Virtual Cockpit compatibility varies by model year and facelift generation. Mismatched components will not function correctly.
Does installing an Audi A3 8V Virtual Cockpit require professional coding?
Audi Virtual Cockpit coding and adaptation is essential. After physical installation, the cluster must be coded to recognize your vehicle's VIN, immobilizer, and existing MMI system.
What OEM Audi A3 Virtual Cockpit parts do I need for a complete retrofit?
A complete retrofit requires the virtual cockpit display unit, instrument cluster housing, and wiring harness adapter (if upgrading from older MMI). Part numbers vary significantly by model year and trim, so use European OEM Parts Direct's VIN search to identify the exact components for your specific A3 8V to avoid compatibility issues.
Can I install a used Virtual Cockpit cluster in my Audi A3 8V?
Used clusters can work, but they carry risks. OEM new units from European OEM Parts Direct provide warranty protection and guarantee compatibility.
Installing an Audi A3 8V OEM virtual cockpit transforms your driving experience and increases your vehicle's resale value. The process requires patience, proper tools, and genuine OEM parts. European OEM Parts Direct supplies the exact components your A3 needs with our VIN search tool and comprehensive inventory. Find the correct parts for your specific model year and trim, and get started with confidence knowing you have genuine components backed by reliable shipping and competitive pricing.